DIY: Fall Wreath Project
At American Heritage Insurance Group, we are always looking for ways to help expand our customer’s creativity. We have noticed that the fall wreaths you can purchase from the stores can become rather expensive. To fix this problem, one of our crafty workers created a fall wreath for under $20.00.
We challenge you to create your own fall wreaths. Who knows, this could turn into a business, and we’ve got your insurance needs covered if it does. We hope that you are able to create your own fall wreaths this season to help decorate your home or office. Good luck and let us know how your wreaths turn out.
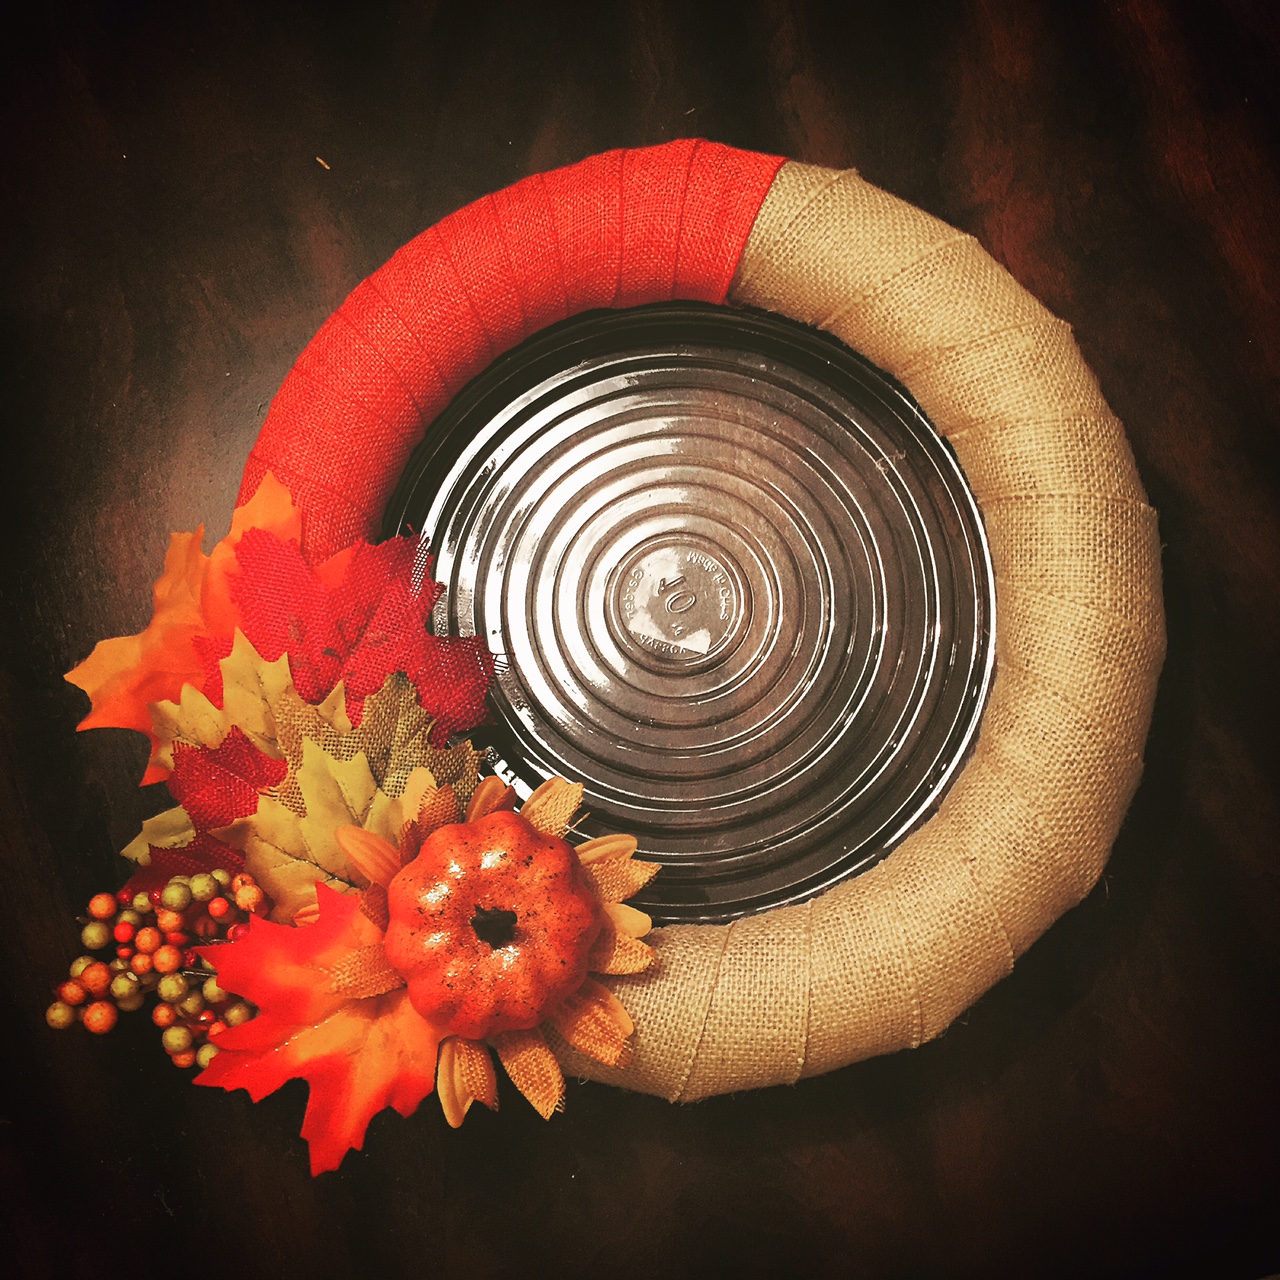
See below for how we created our very own fall wreath shown on the right!

Step 1: Purchase Supplies
Step 1: Purchase Supplies
We purchased our supplies are Walmart and Meijer. If you want to save a trip, just visit Hobby Lobby or Michael’s. They should have all of the crafting supplies we purchased.
Supply List
- 10” Foam Circle
- Natural Burlap Tape
- Orange Burlap Ribbon
- Hot Glue Gun / Hot Glue Sticks
- Various Leaves / Flowers (These could be real but to have your wreath last longer, we recommended purchasing fabric ones)
Step 3: Wrap the Foam Circle with Orange Burlap Ribbon
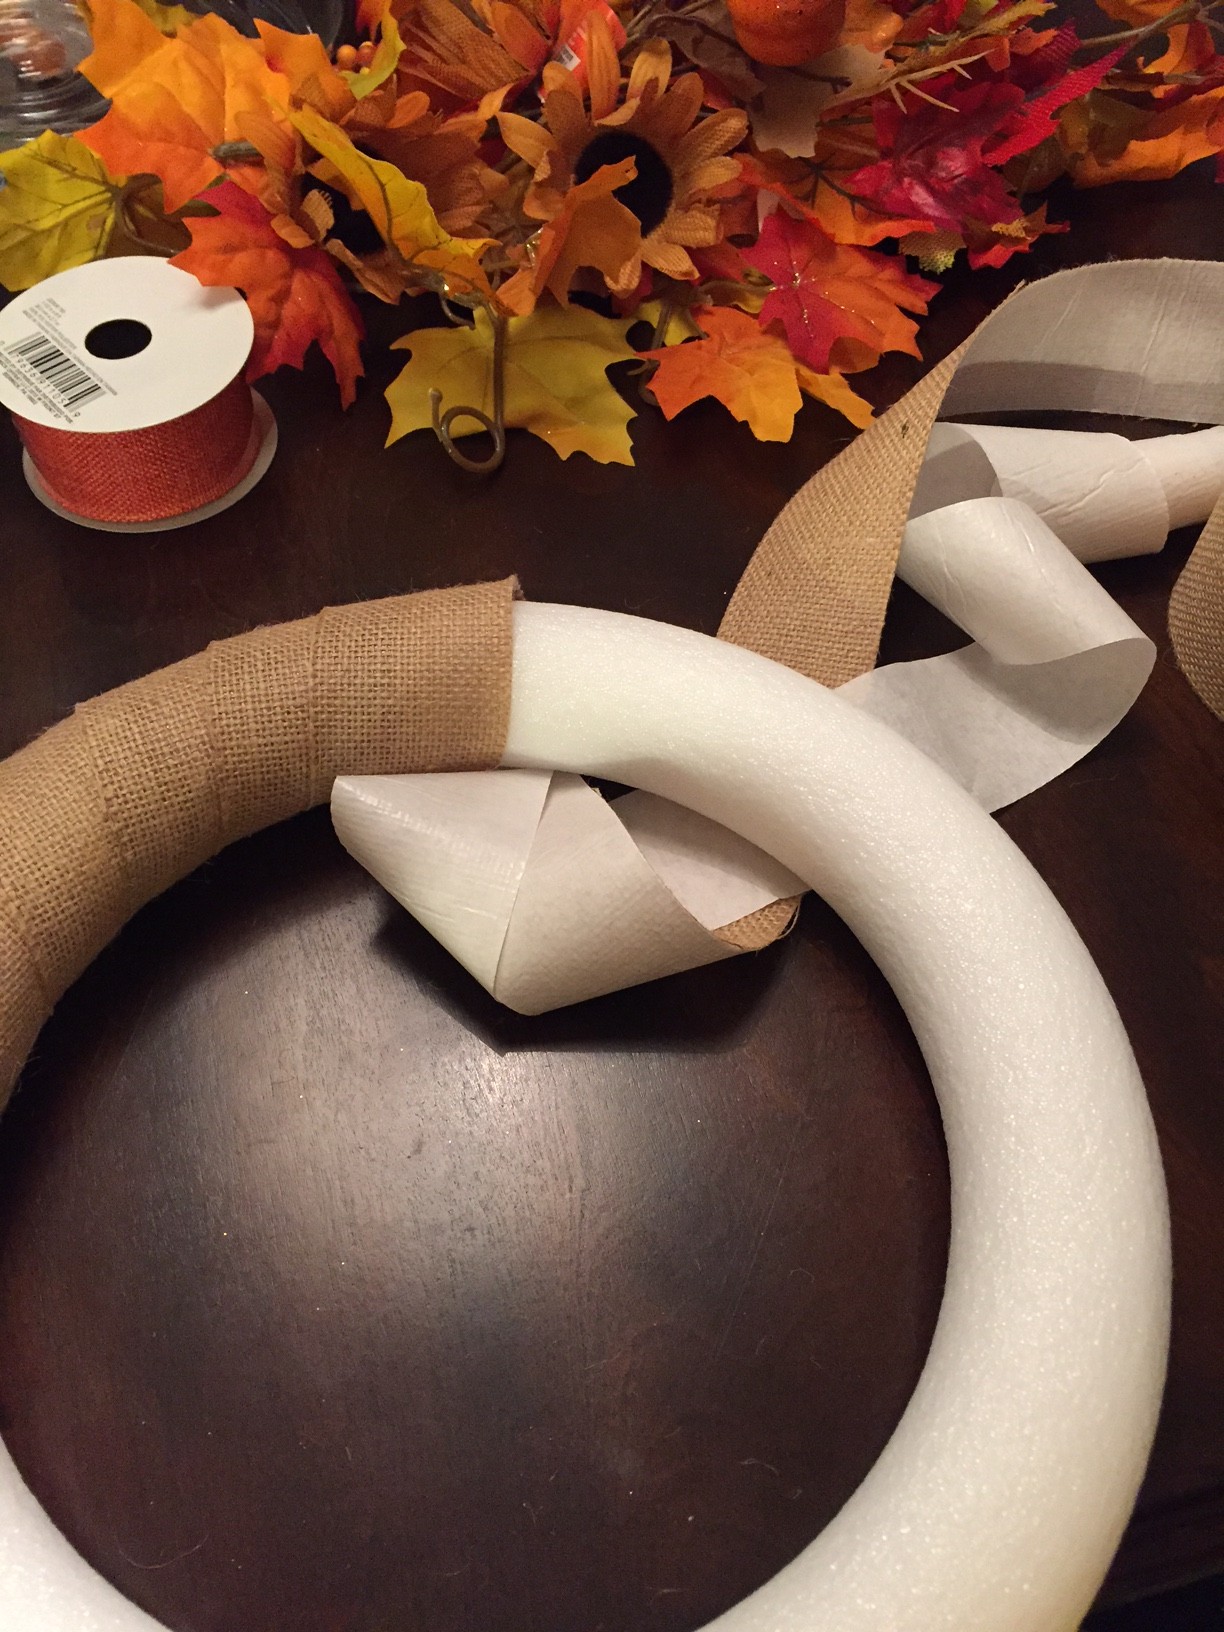
Step 2: Wrap the Foam Circle with the Burlap Tape
Step 2: Wrap the Foam Circle with the Burlap Tape
Start to wrap your foam circle with the burlap tape. Apply it at an angle so it is easier to wrap. The wrapping will not be perfect but that’s what makes this item homemade. One roll of burlap tape will cover about two-thirds of your circle.
Step 3: Wrap the Foam Circle with the Orange Burlap Ribbon
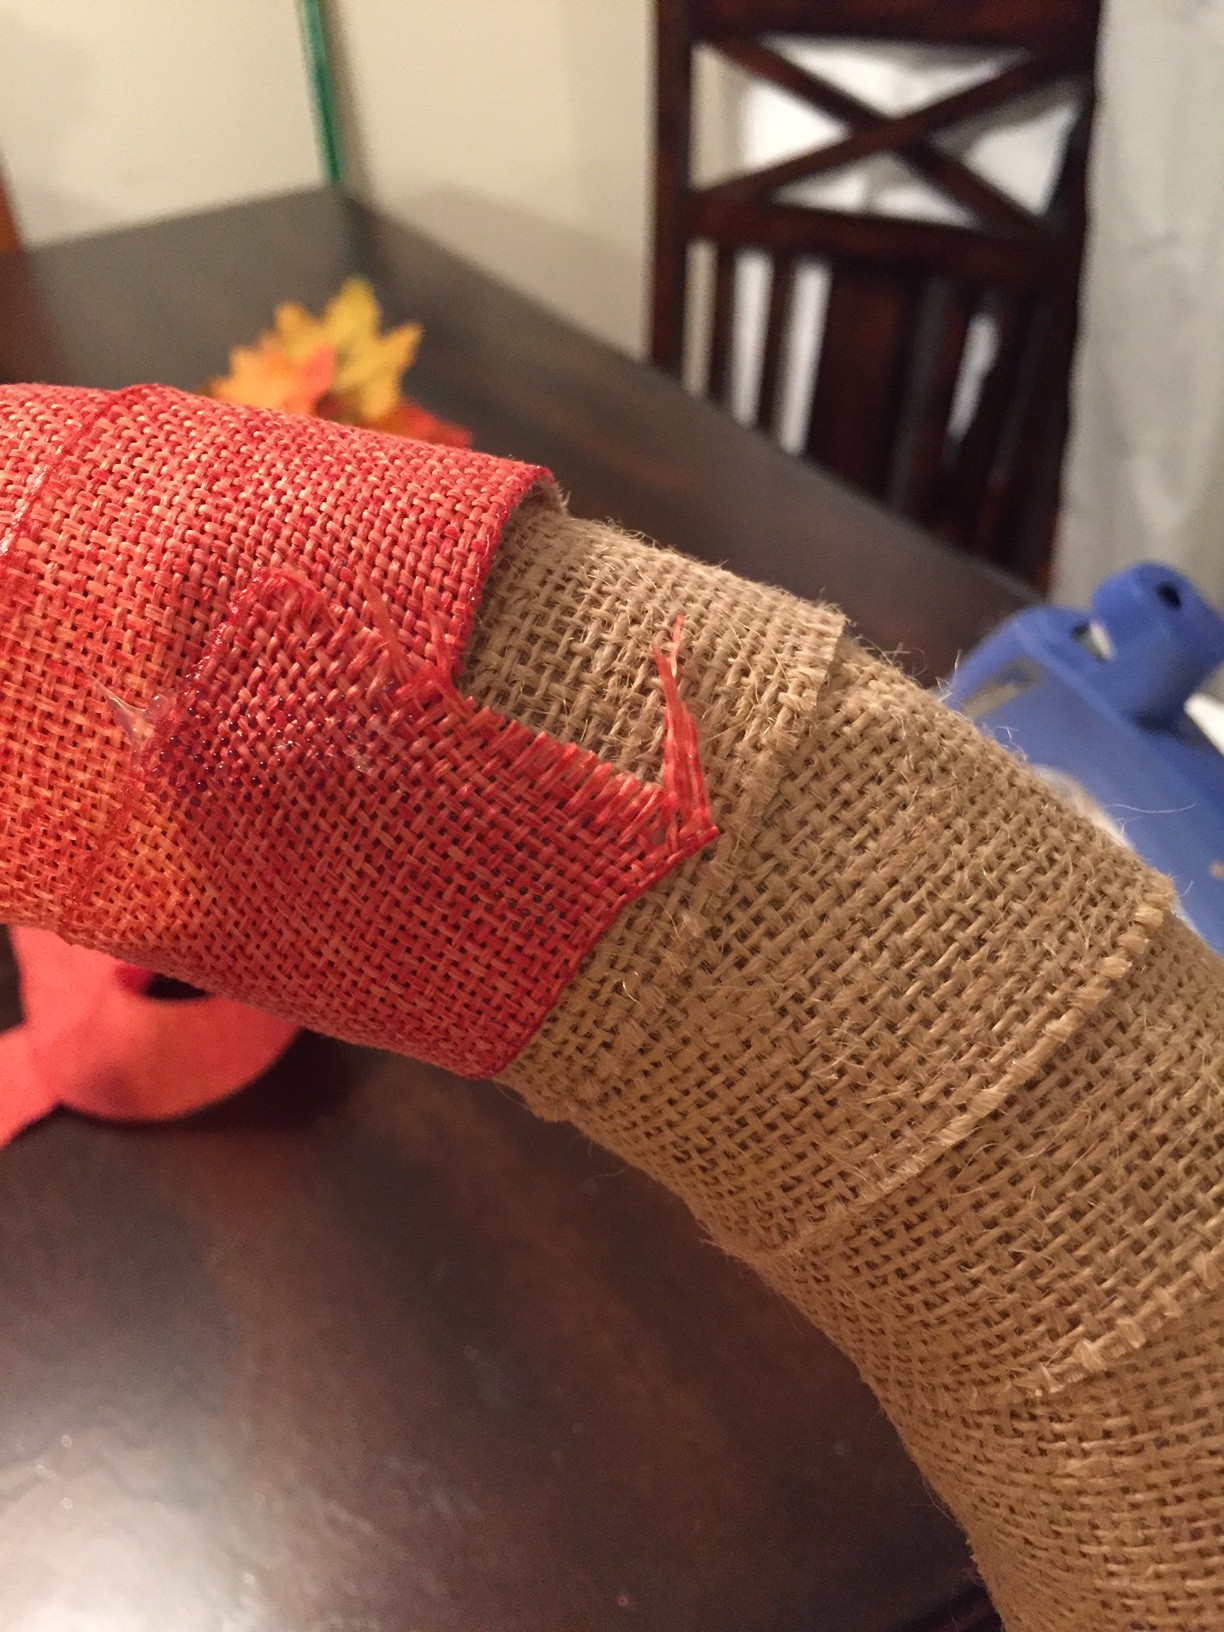
Find where the burlap tape ends on your circle (this should be on the back side of the wreath). Apply a strip of hot glue and carefully press down the orange burlap ribbon. The hot glue can come through the ribbon so try not to touch it too much. Let the hot glue dry for about two minutes. Begin to wrap the white part left on your foam circle. Try to go in a consistent pattern following the one that the burlap tape is in. Make sure you clearly wrap all white areas. We went over the edging of the burlap tape to make it look more cohesive. When you are finished wrapping, trim the ribbon and apply hot glue on the back side of the wreath. Press down the ribbon being careful not to burn yourself.
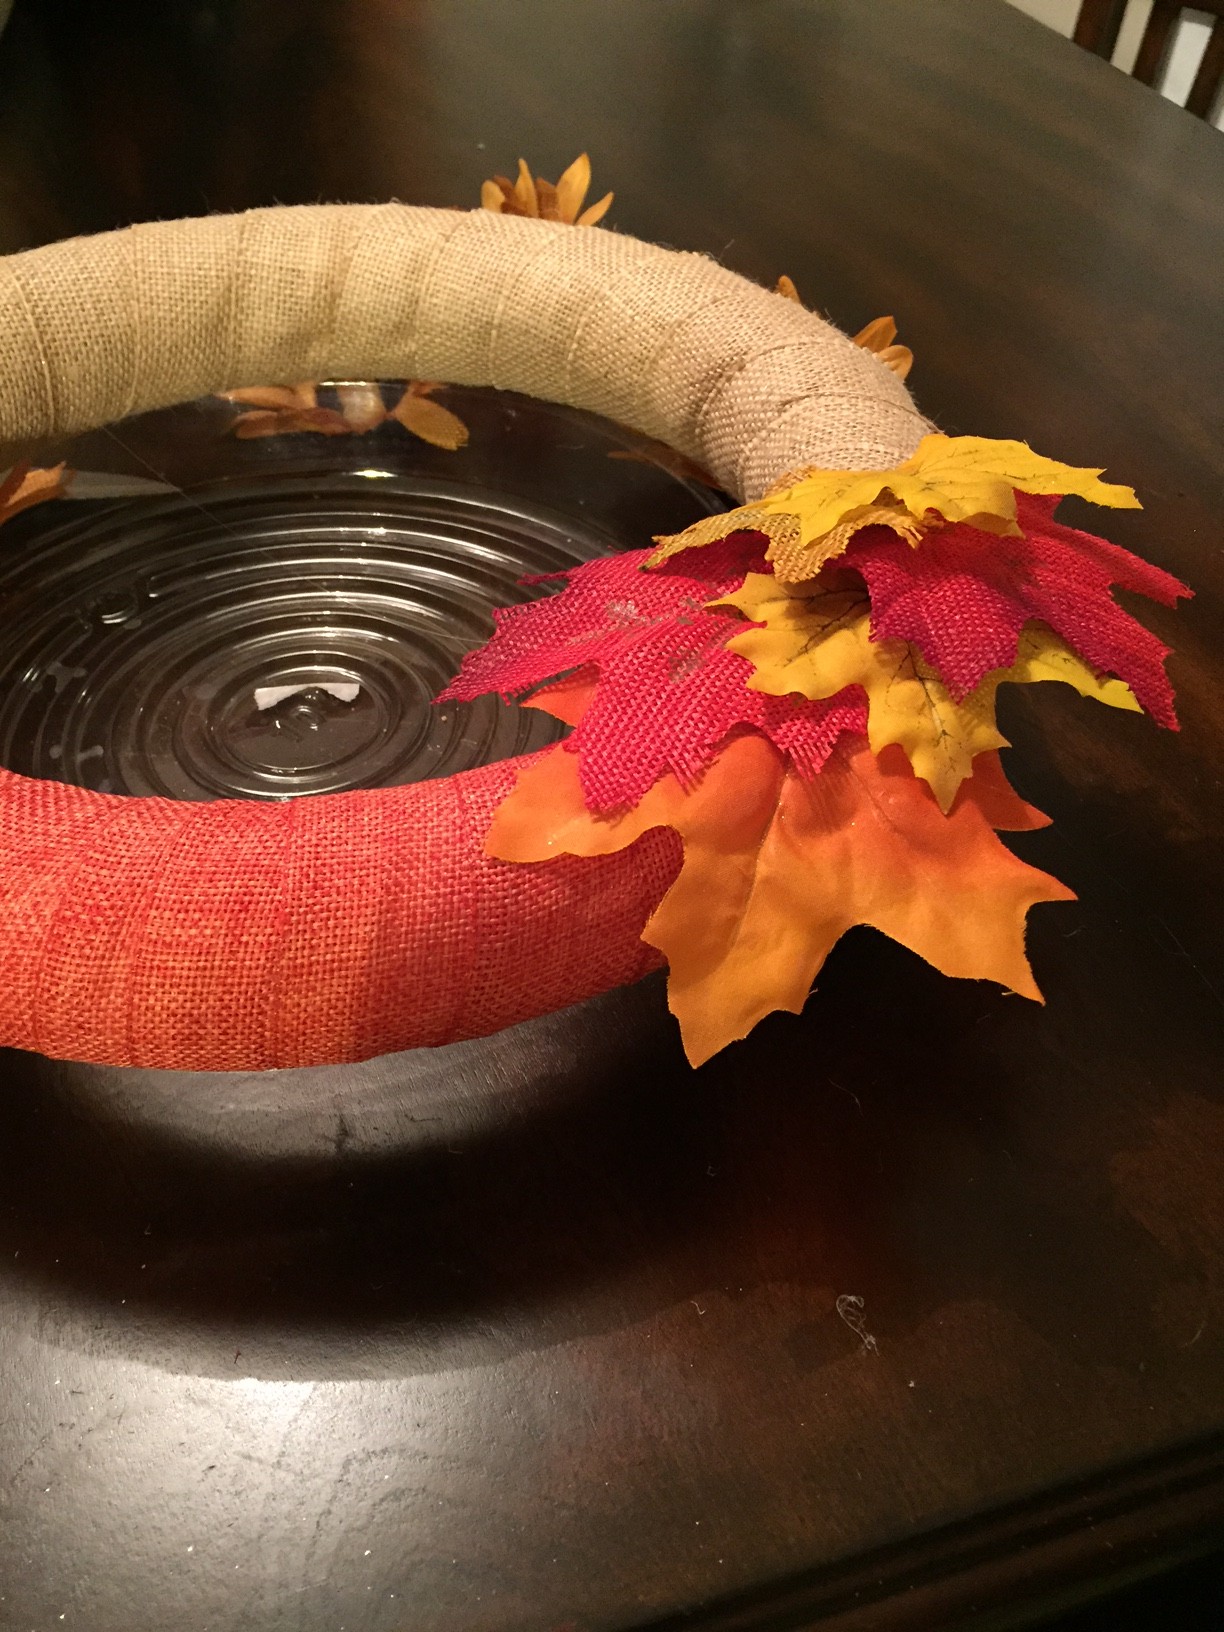
Step 4 & 5: Cut Stems Off Leaves and Apply Onto Wreath
Step 4: Cut Leaves and Other Items
You might need a wire cutter depending on the type of fake leaves you’ve purchased. Cut as close to the fabric of the leaf as possible to trim away all the plastic stem pieces. You want to cut as many leaves off as you would like to use. We cut out about 25 but didn’t use all of them.
Step 5: Apply Leaves and Other Items
You will be using the hot glue gun to adhere the leaves to the wreath. Begin laying down the leaves by place one or two leaves in opposite directions. Let them hang off the edge of the circle so they aren’t pressed flat. From this point on, let your creative mind soar. We just layered a bunch of leaves then added some fake berries and a pumpkin to our design. See the finished product above.
Leave a Reply
You must be logged in to post a comment.